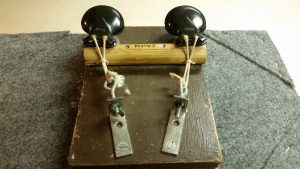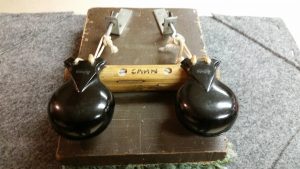
This is a view from the front of the castanet machine I made in high school. The castanets are the standard bakelite ones from the Ludwig catalog of the 1960s. The rail is a 1-1/4-inch diameter pine dowel.
A few months ago I received the following in an email:
Question: I would like to make a castanet machine. I want to use it at schools (children 10-12 years) Can you tell me how to make it, like you did?
My Response: I made my first castanet machine when I was in high school. The needed materials – other than the castanets – can be easily found in most hardware stores, and the basic tools needed – a handsaw, some sandpaper, and an electric drill – are very widely available.
Rather than construct a sheet of specific instructions, I hope it will be more helpful to simply provide photos showing close-up views of several castanet machines I have made over the years.
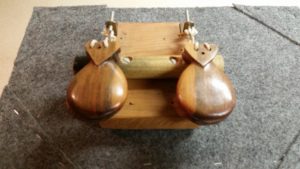
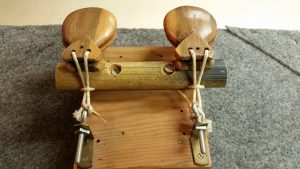
This castanet machine was made when I was in college at the Eastman School of Music. The castanets were found in an import shop, and the rail is a 1-1/4-inch diameter pine dowel.
The most difficult part of construction is drilling the holes in the support rail. The holes are at first drilled down from the top surface about half way through the thickness of the rail. Secondly, holes must be drilled into the back surface of the rail at a slight upward angle, so that each one meets its corresponding downward hole. The end result is that all holes have a sort of lazy “L” shape inside the rail, with each hole allowing a string to pass down through from the top of the rail and then out from the back of the rail.
The rest is up to you. Use your imagination and experiment until you have the castanets sounding the way you like. If your first effort doesn’t work to your satisfaction, don’t become discouraged. Instead, persist; think about what is needed to improve the result you want, and then make it happen.
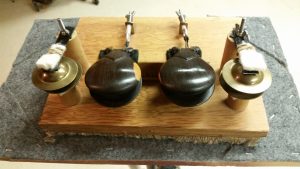
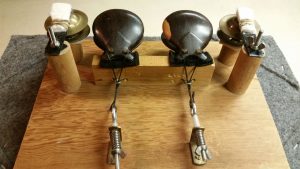
This castanet machine was made for “Samson & Delilah” by C. Saint-Saens when I was in the Rochester Philharmonic. The score calls for castanets of wood and metal. The wooden castanets are from Spain and the metal castanets are finger cymbals.
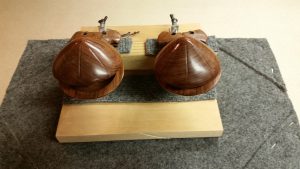
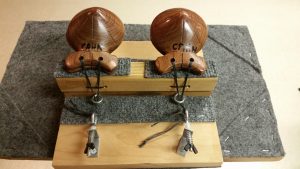
The castanets on this machine were purchased at a music store in Madrid, Spain. They are mid-sized (there were also larger sizes displayed in the store), and the pitch is considerably lower than is commonly heard in the orchestra repertoire.
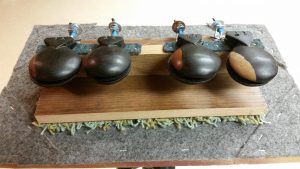
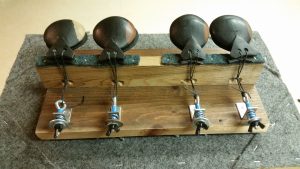
The four pair of high-sounding castanets on this double machine are Spanish. They were recently purchased in a local antique shop.
